Lady Gaga’s Unique Summer 2023 Nail Art – A Step-by-Step Guide to Recreate It at Home

In a bold fashion statement, Lady Gaga has once again left her mark on the beauty world with her distinctive and eye-catching nail art for Summer 2023. The multi-talented artist and trendsetter never fail to amaze us with her innovative style, and her latest nail art design is no exception. If you’re eager to try out her striking look for yourself, we’ve got you covered with this easy-to-follow, step-by-step guide to recreate Lady Gaga’s unique summer nail art in the comfort of your home.

Materials Needed:

Base coat

White nail polish
Pastel-colored nail polishes of your choice
Thin nail art brush or toothpick
Clear top coat
Nail polish remover
Cotton swabs or cleanup brush
Small dish or palette for mixing colors (optional)


Step 1: Prep Your Nails
Start by ensuring your nails are clean and dry. Trim and shape them to your desired length and file the edges for a neat finish. Apply a base coat to protect your nails and extend the longevity of your nail art.
Step 2: Apply White Base
Once the base coat is dry, apply two coats of white nail polish on all your nails. Allow each coat to dry completely before moving on to the next step. The white base will help the pastel colors pop and create a vibrant contrast.
Step 3: Mix Your Pastel Shades (Optional)
If you can’t find the exact pastel colors used by Lady Gaga, don’t worry! You can mix your own shades by using the white nail polish as a base and adding small drops of other colored polishes to achieve your desired hues. Use a small dish or palette for this step to avoid waste.
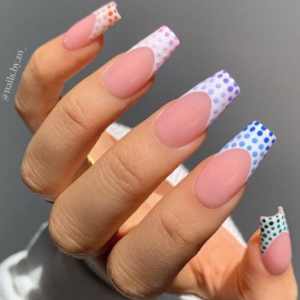
Step 4: Create Abstract Patterns
Now comes the fun part – creating the abstract patterns! Dip your thin nail art brush or toothpick into one of the pastel colors and start drawing geometric shapes, squiggles, lines, or any design that strikes your fancy. Lady Gaga’s nail art is all about embracing creativity and individuality, so don’t be afraid to experiment! You can make each nail different or follow a cohesive theme across all of them.
Step 5: Touch-Ups
If you make any mistakes or if some lines need refining, use a cotton swab or a cleanup brush dipped in nail polish remover to tidy up the edges and perfect your design.
Step 6: Seal the Look
Once you’re satisfied with the patterns on all your nails, wait a few minutes to ensure the designs are completely dry. Then, apply a clear top coat to seal and protect your nail art. The top coat will also add a glossy finish and give your creation a professional look.
Step 7: Flaunt Your Gaga-Inspired Nails
Congratulations! You’ve successfully recreated Lady Gaga’s unique Summer 2023 nail art. Now, show off your fabulous nails with confidence and be prepared to receive compliments on your creativity and style.
Remember, the best part about nail art is that there are no rules – let your imagination run wild and have fun expressing yourself through your nails, just like Lady Gaga does!