Traditional bridal bouquets only last forever in pictures, but for a show-stopping statement piece that stands the tests of time—no preserving necessary—a brooch bouquet is a beautiful choice. Watch our brooch bouquet tutorial or follow the steps below to learn how to make a brooch bouquet using your vintage brooches, colorful baubles and heirloom jewelry.
What Is a Brooch Bouquet?
A brooch bouquet uses vintage jewelry and baubles in place of flowers in a bridal bouquet. This a great option if you’re a bride looking for a non-floral bouquet that is not only beautiful but also can carry some emotional value. By borrowing a bit of bling from your relatives and relatives-to-be, you’ll carry in hand a wow factor that’s filled with memories of your family and friends. Have loved ones who’ve passed? Honor their lives by including hand-me-down pieces they enjoyed wearing. For example, include your grandmother’s favorite rhinestone earrings or the cufflinks your great uncle wore on his wedding day.
If heirloom options are limited, turn your bridal shower into an event to gather great pieces. Much like favorite children’s books are asked from guests invited to a baby shower, ask bridal shower guests to bring a favorite statement piece to adorn your bridal brooch bouquet. Jewels can be new or old, given as gifts, or borrowed for later return. Skip the shower games, and instead of have a memorable show-and-tell to learn of all the stories that come with the brooches and baubles you’ll be carrying on your big day.
Brooch Bouquet Supplies
While you may need to visit a hardware store if using a dowel, a round wooden rod, for your DIY base, most of the following bridal brooch bouquet supply list is available at local craft stores. You can even find vintage-looking brooches and baubles in the jewelry aisles. However, a great way to incorporate the females in your family (and don’t forget those new in-laws!) is to borrow brooches, earrings and statement baubles to add sentimental touches to a personalized brooch bouquet.
Click here to preview your posts with PRO themes ››
Need more bling to fill up your base? Look for vintage brooch and bauble “lots” on eBay, or head to local thrift and vintage boutiques for unique finds. Purchased new in craft stores, brooches and baubles can cost between $4 and $12 per piece, depending on size and style. However, lots on eBay can be a steal, with multiples vintage and antique jewelry starting at the same cost as one just one individual piece. When shopping thrift shops and boutiques, don’t just look in the jewelry counter. Look for fancy buttons on a vintage sweater, clasps on old purses, or shiny embellishments that can be removed from shoes.
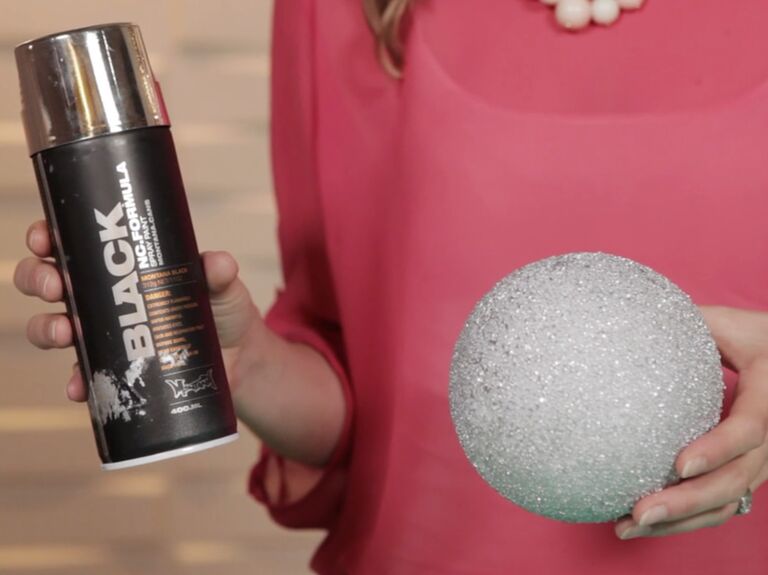
- Spray paint
- Styrofoam ball (4 to 6 inches)
- Bouquet holder or handle (such as an 8-inch dowel)
- Baubles and brooches
- Flat-head pins
- e6000 glue
- Tulle
Making the Brooch Bouquet
Step 1: Prep the Base

To make your wedding brooch bouquet, you have two main base options: a premade bouquet holder, which typically includes a caged floral foam ball mounted to a handle; or the following DIY version using styrofoam, a wooden dowel and spray paint.
- In a well-ventilated area, spray paint the styrofoam ball and bouquet handle in a metallic color of your choice. Spray evenly in thin layers to avoid paint drips.
- When dry, push one end of the dowel rod into the center of the styrofoam ball to create an open space. Drizzle e6000 glue inside of the space, as well as line one end of the handle. Insert the handle into the opening and let the glue set for about 24 to 36 hours.
Step 2: Attach the Baubles and Brooches

To cover your 4- to 6-inch base, you’ll likely need anywhere from 30 to 60 baubles and brooches, depending on their size, the size of your base, and how layered of a look you want to achieve. For baubles or brooches you’re not looking to reuse or return to a family member, add a dab of e6000 glue to the head of a pin, and attach it to the back of the jeweled piece. Because you’ll want to let the glue dry before attaching the bauble to your base, doing all of your gluing first is recommended.
Click here to preview your posts with PRO themes ››
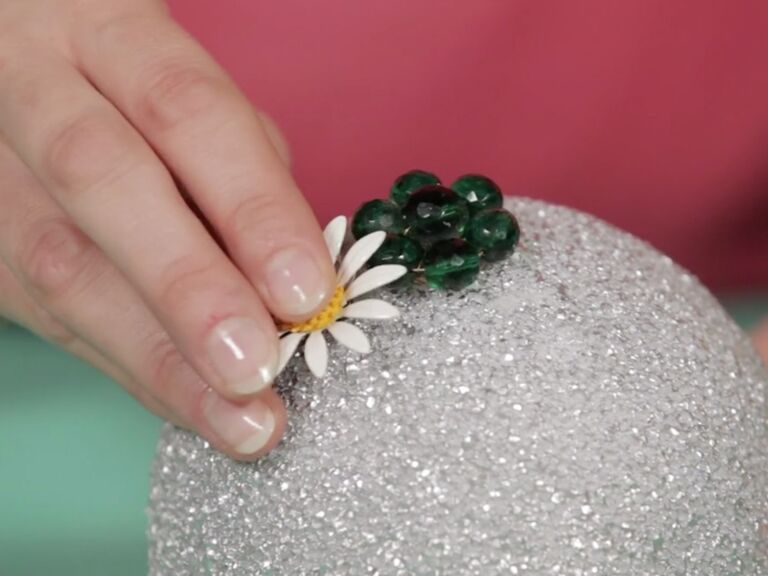
- When dry, pin the baubles and brooches into the styrofoam ball, using a dab of e6000 glue on the tip of the pin for any that feel a little loose.
- For heirloom or borrowed embellishments, skip the glue and use the original backing to attach to the base. For example, open a clip-on earring, and push the back straight into the styrofoam ball. Or unhinge and stick in the original straight pin on the back of a brooch.
- If you have a piece with either no backing or one that is too small to secure to the base, use multiple flat-head pins or pieces of twisted floral wire to help anchor the jewels to the bouquet. Repeat attaching the baubles and brooches until the entire styrofoam base is covered.
Step 3: Decorate with Tulle

Complement the hard edges of the brooches with the softness of fabric, such as tulle in one of your wedding colors.
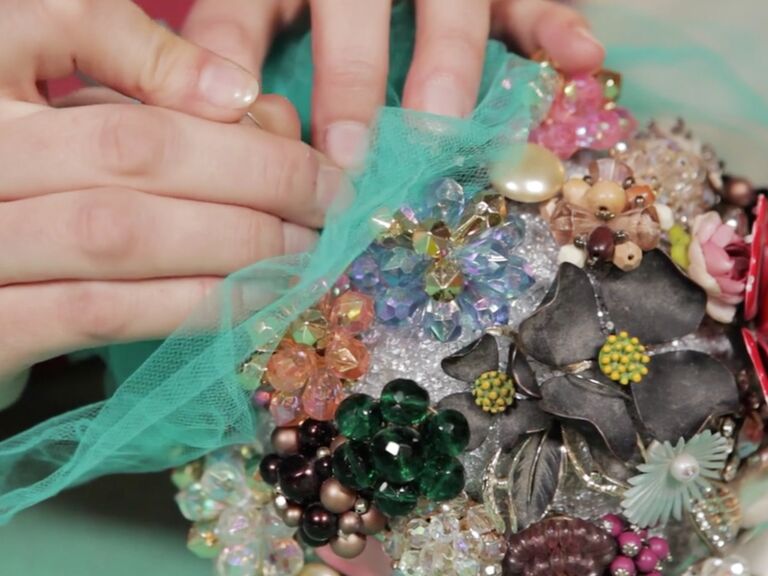
- Loosely tie a length of tulle around the top of the bouquet handle to cover the opening.
- Create almost a nest-like shape with the tulle, by fluffling, tucking and pin-securing the edges to the styrofoam ball.
- To further personalize your vintage brooch bouquet, wrap an heirloom handkerchief around the handle or incorporate tulle from a grandmother’s wedding slip or veil.
A Brooch Bouquet with Just-for-You Style
While no two wedding brooch bouquets are sure to be the same, you can really set your DIY arrangement apart with these unique styling options.
- Brooch and Flower Bouquet: If you’d rather be a bride holding blooms but love the idea of vintage brooches, blend the two for your perfect bridal bouquet. Attach brooches and baubles sparingly among the flowers, or ask your florist to add the bling on your behalf. For an affordable version, attach brooches and baubles to the flower centers on a large head silk hydrangea. Use e6000 glue to affix or floral wire for a more temporary attachment.
- Cascading Brooch Bouquet: If you’re the crafty type who’s not afraid of a DIY challenge, create a cascading brooch bouquet by incorporating hanging items, such as dangly earrings and brooches, and bracelets and necklaces of varying lengths to the front quarter of your bouquet. Since these pieces will be slightly less supported, make sure they are securely fastened into the base using glue, pins or floral wire.
- Brooch and Feather Bouquet: Add faux feathers for texture and colorful elegance. Create a peacock brooch bouquet by color coordinating your gems in vivid blues, purples, and aquas.
- Heavy Metal Brooch Bouquet: For a stunning statement piece, go for an all silver or all gold brooch bouquet. Create depth by mixing different tones of the monochrome metal.
- Colorful Brooch Bouquets: Want a pop of color in hand against your all-white wedding dress? Style your DIY brooch bouquet in one or more of your wedding hues. Colors such as blue, pink or purple brooch bouquets are boldly beautiful and add great sparkle and shine on your way to meet your groom.

