While your invitation wording and design hint at your wedding style, so does the printing process you choose—most notably, it conveys how formal your wedding will be. The way you choose to print will also have a big impact on your budget and, in part, dictate the paper type and the design. To help you choose a technique, here’s a rundown of all your options.
Engraving
Crane Invitations
What it looks like: The letters are raised on the front and indented (often called a bruise) on the back of the invite. Engraving is ideal for an ultra-formal affair (and has the price to match—it’s one of the most expensive printing methods).
How it’s done: An image is etched into a metal plate that’s then filled with ink. Paper is then pressed onto the plate (with a pressure of approximately 3,000 pounds) to receive the ink. This creates a raised type on the front and an indentation on the back
Paper pointers: Engraving generally works best on thick paper, like cotton fiber. (Flimsier stocks like parchment will break apart in the engraving process.) It’s also a great option if you’re printing on colored paper.
Ink tips: The ink used is incredibly thick, so you can print a light ink on darker paper and it will still show up. While you can incorporate multiple ink colors with engraving, it’s more time-consuming (and expensive), as each color requires its own plate and a separate pass on the printing press.
Turnaround time: An engraved invitation order can take anywhere from two to six weeks to complete depending on the printer and the proofing process.
Thermography
What it looks like: It’s virtually indistinguishable from engraving, except that the lettering is slightly shiny and the back of the invitation remains smooth. And like engraving, thermography has a formal look (only without the hefty price tag).
How it’s done: A heat-based process that fuses ink and resinous powder to create raised lettering. It’s only subtly different from engraving work but less expensive.
Paper pointers: Cotton fiber is usually a good paper option. Stay away from pearlescent or shimmery paper with thermography. The shiny combination won’t look good together and will be hard to read.
Ink tips: You’re more limited in terms of color: Because this method fuses ink with powder, it’s not as easy to get a pretty pastel hue. Stick with lightly colored paper and darker ink. Thermography is best for small graphics (like patterns)—full-color images won’t come out well.
Turnaround time: An order can be completed in just a few days, depending on the stationer.
Letterpress
Kelly Hornberger
What it looks like: The letters are indented on the front and slightly raised on the back of the invite. The look is textural and sophisticated. It’s normally used for traditional designs (but doesn’t have to be) and is one of the priciest printing methods. That said, many stationers offer lower-priced letterpress lines—but with fewer options for customization.
How it’s done: This is a labor-intensive method in which text or an image is etched in reverse (think: mirror image) on a raised surface (typically a plate) and coated with ink to produce a physical impression on the paper.
Paper pointers: Letterpress requires soft, bulky paper, so you’re limited to thick card stock, like cotton fiber or bamboo paper (lines and details won’t appear precise and patterns won’t imprint well on thinner paper). Also, stick to white or light-colored paper and darker ink. The ink used for letterpress is thin, so white or pastel inks tend to look gray and dull on black or dark paper.
Ink tips: Stick to just one or two ink colors, especially if you’re on a budget or have a tight timeline. Each color has to be pressed separately on the printer.
Turnaround time: Depending on the stationer you use, an order can take anywhere from two weeks to two months.
Digital Printing
Rebecca Yale
What it looks like: The results are similar to what you’d get from a home laser printer, but professional printers offer higher quality, so you won’t wind up with the fading or smudging you might get from printing them yourself. This process is ideal for more casual or funky wedding styles and for couples who are on a tight timeline or budget.
How it’s done: The printer uses thousands of tiny ink dots to form letters and designs on the paper.
Paper pointers: Digital printing is typically done on thinner paper that’s flexible enough to be sent through a printer. Few companies are able to print on thicker cotton fiber paper.
Ink tips: While the ink won’t appear as dynamic as it will using other printing processes, you can pretty much choose any color you’d like.
Turnaround time: It’s the least expensive and fastest printing option, requiring just a few days for production and shipping.
Offset Printing (aka Lithography)
Allison Kuhn Photography
What it looks like: Offset printing is similar to digital, but the quality is higher and it’s slightly more expensive. The letters and designs are flat. It’s a great budget-friendly printing method that works well with more casual designs.
How it’s done: A rubber stamp-like cylinder is used to press ink onto the paper. This method is used more for save-the-dates, as it’s less formal.
Paper pointers: You get more paper options with offset printing than you do with digital, so if you’re looking to use more textured papers like cotton or bamboo, you might choose offset printing.
Ink tips: Designs and lettering will look more vibrant than they do with digital, plus you have free rein with your color and design choices.
Turnaround time: It has a slightly longer turnaround time than digital—usually a few days to a week. Unlike digital printing, a custom plate is required and the ink is premixed beforehand. This adds a few extra days to the process.
Foil Stamping
Karlisch Photography
What it looks like: The paper-like foil leaves a metallic design behind. Foil stamping complements a luxe, romantic wedding, but it’s also become increasingly popular for whimsical and casual invites.
How it’s done: A heated copper plate is used to push the foil into the paper, which leaves an impression much like letterpress. This printing process is considered “dry printing” because it doesn’t actually use any ink.
Paper pointers: Create a dramatic effect using lighter foils (like silver and white) on darker papers. Keep in mind, though, that your design options are more limited because thin, delicate lines won’t show up very well. Too much foiled text is difficult to read, so it’s best to restrict it to key words, borders or intricate designs.
Ink tips: It’s not ink, per se, but know that a little goes a long way.
Turnaround time: Foil stamping is the most expensive printing process and is often outsourced, which means a longer turnaround time (and most stationers can’t do rush orders on foil stamping). The process can take around 10 business days with a stationer who does the stamping in-house—but up to two months if they send it to a printer who specializes in foiling.
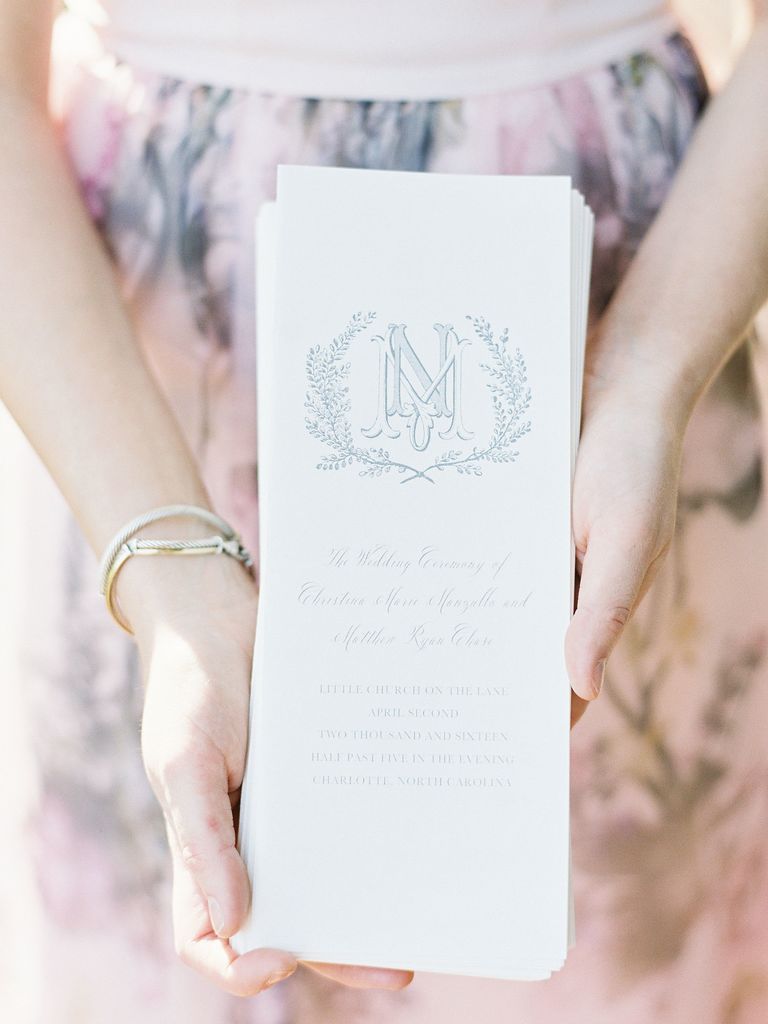
Embossing
What it looks like: Think of it as engraving but on a slightly larger scale. Letters and images appear raised but colorless. It’s perfect for monograms and bordering. The look is subtle yet modern.
How it’s done: This non-ink technique is most often used for border motifs or design extras. It creates a raised-relief surface for added dimension.
Paper pointers: Embossing is typically done on thicker paper stock like cotton fiber so the designs show up with crisp lines and impressions.
Ink tips: Inkless embossing (or blind embossing) is a popular choice for a delicate touch. Adding colored ink is also an option, but it could limit the flexibility of your design.
Turnaround time: Because embossing is very similar to letterpress and engraving, it generally takes about the same amount of time to print, which, again, depending on your stationer, takes about three to five weeks.
Who is ready for an authentic, wedding inspiration with a Mediterranean vibe? We have to admit that sounds pretty irresistible to us! Cozy intimate moments, thoughtful details, eye-catching tablescapes with blossoms and vegetables in vivid colors, adding …
Inspired by the beautiful almond blossoms, with the softest colors, the romantic candlelight and even the sweet pop of anemones, all the magic happens in this beautiful wedding decoration by MR.CO Event Planning ! Not only is the color palette sensational, …
The best decor ideas for an outdoor wedding Planning an outdoor wedding ? Look no further than our list compiling some of the trendiest ways to decorate it. From elegant string lighting to rustic wine barrels , we’ve got inspiration for every theme. 1. …